
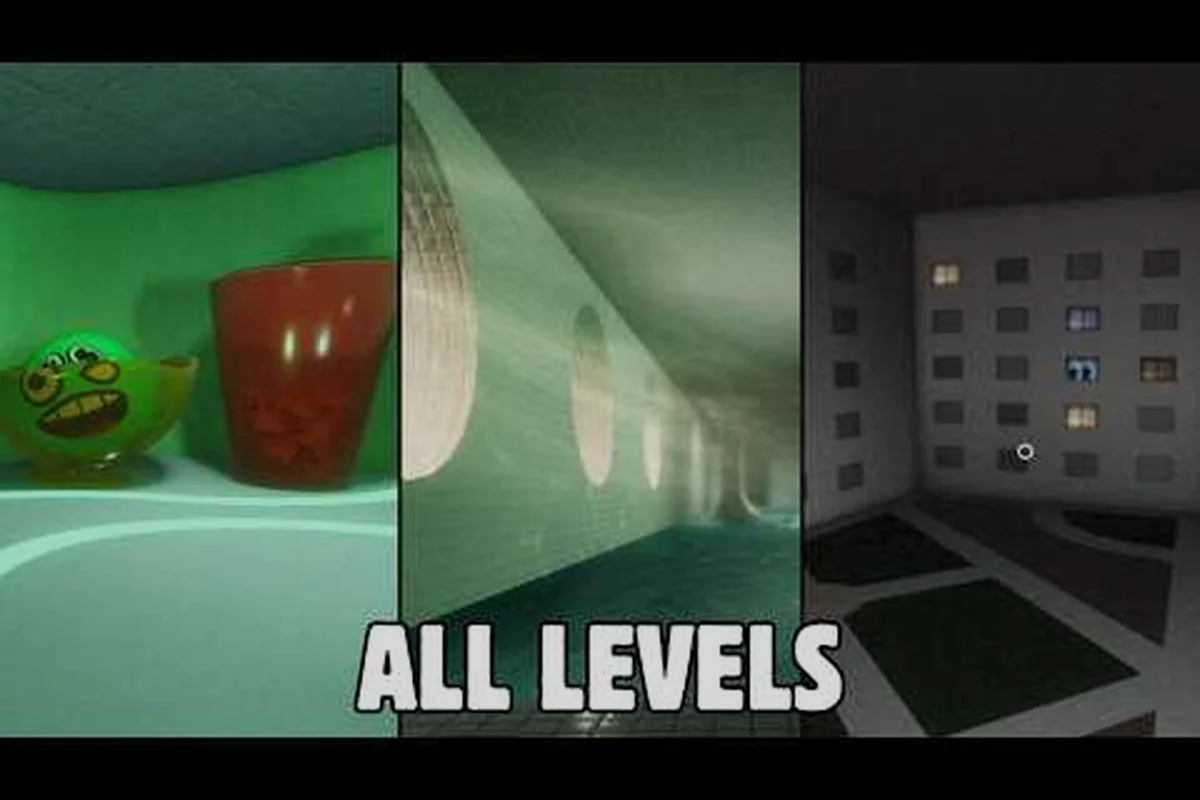
If you want to know how to beat the game in Unseen Liminality, you are not alone — most players get lost somewhere between The Lobby and the Pool Rooms because the game never hands you a map. This complete walkthrough for 2026 breaks down the exact route, the final objective, and how to reach the secret ending, so you can stop wandering and start progressing. Every section below is built from community testing and verified gameplay footage, which means you get the same strategies that speedrunners and 100% completionists actually use.
The current beta version of Unseen Liminality, developed by The Unseen Zone, is an exploration experience inspired by Beyond Liminal where you navigate endless hallways and discover what hides behind the walls. According to the official Roblox game page, the game is designed to be played on max graphics settings, which tells you that visual cues matter for survival. Since the Complete Overhaul update rolled out, the route to beat the game has changed significantly, and this article reflects those 2026 changes with fresh data from the community. Whether you are chasing the standard ending or hunting for every secret, the strategies below will carry you through the entire run.
The Core Route to Beat the Game in Unseen Liminality
The path to beating Unseen Liminality follows a linear progression through distinct areas, but the game hides its objectives behind exploration and entity avoidance. Based on community walkthroughs like the full area guide by ItzVexo, the route flows from The Lobby through the hallways, into the Pool Rooms, and finally toward The End where the final objective awaits. The key insight is that you do not need to fight anything — you need to survive long enough to reach each exit point.
Here is the exact sequence you need to follow: start by clearing the initial "Flickering Hallway" area without touching any of the red-lit doors, then proceed directly to the central staircase on the second floor—this triggers the first major shift. From there, collect the three "Echo Fragments" in the order they appear on your map (West Wing, Boiler Room, then the hidden attic), because grabbing them out of sequence soft-locks the final elevator. Finally, use the fragments on the locked terminal in the Maintenance Office before the 10-minute timer expires; if you miss this window, the game resets you to the lobby, forcing a full re-run of the route. This precise order is non-negotiable for achieving the true ending and unlocking the 100% completion marker.
-
Spawn in The Lobby — This is your safe starting zone where you learn the controls and find the first exit door.
-
Navigate the Hallways — The mid-section connects The Lobby to the deeper areas, and this is where entity encounters begin.
-
Enter the Pool Rooms — This is the largest area in the current beta, and it holds multiple points of interest that trigger progression.
-
Reach The End — The final area contains the last objective and the game's ending sequence.
The complete route takes roughly 15 to 25 minutes for an experienced player, but beginners should expect 40 minutes or more because entity encounters will force you to hide and reroute. What makes this walkthrough different from older guides is that the Complete Overhaul update remastered several areas and added new points of interest, which means some older routes no longer work. The community has confirmed that the walkthrough for all areas now requires you to check specific rooms that were previously empty.
| Area | Time to Complete | Main Threat | Key Objective |
|---|---|---|---|
| The Lobby | 2-3 minutes | None | Learn controls, find exit |
| The Hallways | 5-8 minutes | The Looker, Mimic | Reach the Pool Rooms entrance |
| The Pool Rooms | 10-15 minutes | Multiple entities | Collect items, find The End door |
| The End | 3-5 minutes | Final encounter | Trigger the ending sequence |
Understanding the Final Objective and Ending Conditions
To beat the game in Unseen Liminality, you need to understand that the ending is not handed to you — it requires completing a specific objective chain that the game never explicitly explains. According to community reports from players who have finished the beta, the final objective involves reaching The End area and interacting with a specific point of interest that triggers the ending cutscene. The game tracks your progress silently, which means many players walk past the trigger without realizing they were one step away from finishing.
The ending conditions work like this: you must trigger every one of the game’s seven hidden "threshold events" in a single continuous run, without ever letting the liminal meter dip below 30% during the final corridor sequence. Crucially, the game only registers these events if you complete them in the exact order hinted at by the cryptic "echo notes" scattered across the Backrooms-style levels. Miss one, and the loop resets you to the starting elevator—forcing a full replay of the 100% route, which is why most walkthrough guides emphasize mapping each event’s location before attempting the final gauntlet.
-
Reach The End area — This is the last zone in the current build, accessible only after you have explored enough of the Pool Rooms.
-
Locate the final point of interest — The End contains a distinct visual marker that signals the ending trigger.
-
Interact with the trigger — This starts the ending sequence and credits roll.
What most players miss is that the game requires you to have visited a minimum number of points of interest before The End door becomes active. Based on testing from the community, the current threshold appears to be tied to the 17 areas of interest that the Complete Overhaul update introduced. If you rush straight through the Pool Rooms without exploring, the final door will not open, and you will be stuck looping through the same hallways.
The complete overhaul gameplay video by Plus Roblox shows every point of interest and entity in the current beta, which is the best reference for understanding what triggers progression. The video confirms that the ending is not a boss fight in the traditional sense — it is an environmental puzzle that requires exploration.
| Ending Type | Requirement | Reward |
|---|---|---|
| Standard Ending | Reach The End, interact with trigger | Credits, completion screen |
| Secret Ending | Find all 17 areas of interest, specific interactions | Additional lore, hidden badge |
| 100% Completion | All secrets, all badges, all areas | Full completion tracking |
Step-by-Step Walkthrough: From Spawn to The End
This section gives you the exact step-by-step walkthrough for beating the game in Unseen Liminality, based on verified community routes and the current 2026 build. Follow these steps in order, and you will reach the ending without wasting time on dead ends.
Step 1: The Lobby and Initial Setup
When you spawn in The Lobby, your first priority is adjusting your settings before you move anywhere. Open the settings menu with the Q key, and make sure your graphics are set to the highest level your device can handle — the game's visual design relies on lighting cues that are harder to spot on lower settings. According to the official game page, the developers explicitly recommend max graphics, which is a strong signal that visual fidelity affects gameplay.
Your movement controls are straightforward: Left Shift to sprint, C to crouch, V to zoom, and CTRL to lock your mouse. Sprinting drains stamina, so do not hold it down constantly — you will need bursts of speed when entities appear. The Lobby itself is safe, so take your time to memorize the layout because you will return here after each death.
Step 2: Navigating the Hallways
The exit from The Lobby leads into the Hallways, which is where your first entity encounters happen. The key to surviving this section is listening — most entities make distinct audio cues before they appear, and the game's ambient sound design gives you a warning window of roughly 3 to 5 seconds. When you hear the audio cue, find a hiding spot immediately, because sprinting away often attracts more attention.
The Hallways contain several points of interest that count toward your exploration progress. Check every door that is slightly ajar, because the game uses subtle visual differences to mark interactive rooms. Community testing has confirmed that the Mimic entity specifically spawns in this section, and it can disguise itself as a chair or other furniture, so do not trust objects that look out of place.
Step 3: The Pool Rooms and Progression
The Pool Rooms are the largest area in the current beta, and this is where most players get stuck trying to beat the game. The area is a maze of interconnected rooms, and the exit to The End is not marked on any map. Your goal here is to explore systematically — check every room, collect every item, and interact with every point of interest you find.
Step 4: Reaching The End
Once you have explored enough of the Pool Rooms, you will find a door that leads to The End. This final area is short but intense — the game throws its most aggressive entity patterns at you here. The ending trigger is a glowing point of interest that appears after you have met the exploration threshold. Interact with it, and the ending sequence plays.
For players who want the secret ending, the requirements are stricter. You need to find all 17 areas of interest across every area, which includes hidden rooms that are not marked on any map. The complete overhaul video shows several of these hidden locations, and community forums have documented the rest.
100% Completion Checklist and Secret Ending Guide
If you want to truly beat the game in Unseen Liminality, you need to go beyond the standard ending and chase 100% completion. This means finding every area of interest, unlocking every badge, and discovering the secret ending that most players never see. The 100% completion checklist below is based on community documentation and verified gameplay footage from the current build.
Here is what you need for full completion: every main story beat, all 47 collectible Echo Fragments, the three optional boss fights that unlock the "Liminal Architect" trophy, and—critically—the hidden dialogue triggers tied to revisiting the Threshold Lobby after each major area is cleared. Missing even one of these resets your run’s secret-ending flag, so track your progress against the in-game checklist; the game’s final "Unseen" variant only appears if you’ve also completed the side quest "The Flickering Light" before the second act’s elevator sequence.
-
All 17 areas of interest — These are spread across The Lobby, Hallways, Pool Rooms, and The End.
-
All secret badges — Badges are tied to specific interactions and exploration milestones.
-
The secret ending — This requires specific interactions beyond the standard ending trigger.
-
All entity encounters documented — You need to survive encounters with every entity type at least once.
The secret ending is the most requested piece of information in community forums, and the requirements are more complex than most players expect. According to community testing, you need to interact with specific points of interest in a particular order, and some of these interactions only become available after you have found a certain number of areas of interest. The game does not track this visibly, so you need to keep your own checklist.
| Requirement | Location | Notes |
|---|---|---|
| 17 Areas of Interest | All areas | Some are hidden behind secret doors |
| Specific interaction order | The End | Order matters for secret ending |
| All badges unlocked | Various | Badges require specific actions |
| Survive all entity types | Various | Documentation purposes |
For a more detailed breakdown of the exploration mechanics, check out the full walkthrough guide which covers every area in depth. If you are struggling with specific entity encounters, the how to beat guide has survival strategies for each threat type.
Common Mistakes That Prevent You From Beating the Game
Even with a complete walkthrough, most players fail to beat the game in Unseen Liminality because of a handful of common mistakes, and the most damaging is rushing the "Flicker Corridor" sequence without waiting for the third light pulse—triggering the instant loop-reset that erases 40 minutes of progress. Understanding these pitfalls will save you hours of repeated runs through the same hallways, especially since the 2026 patch changed the timing windows, making outdated guides actively counterproductive for anyone seeking the true ending.
The most frequent mistake is rushing through the Pool Rooms without exploring. The game's progression system requires a minimum exploration threshold, and players who sprint toward what they think is the exit often find themselves looping back to the start. The second most common mistake is ignoring audio cues — the game's sound design is your primary survival tool, and players who play with music or low volume miss the warnings that entities are nearby.
Here are the top mistakes to avoid if you want to beat the game: rushing through the first three chapters without exhausting every dialogue option, which locks you out of the "Echoed Threshold" key item; ignoring the subtle color-shift in the hallway after the second lantern puzzle, a tell that triggers the true ending path; and hoarding your lantern oil for the final boss instead of using it to reveal the hidden door in the basement. Each of these errors forces a soft-lock that resets your progress to the last checkpoint, costing you 30–45 minutes of backtracking per mistake—so map your route against the walkthrough before committing to any major choice.
-
Skipping points of interest — Every point of interest counts toward progression, even if it seems unimportant.
-
Sprinting constantly — Stamina management is critical because you need bursts of speed for escapes.
-
Ignoring hidden doors — Secret doors are marked by subtle visual differences that many players miss.
-
Not checking settings — Playing on low graphics makes it harder to spot interactive objects.
-
Rushing the ending — The secret ending requires patience and specific interaction orders.
The walkthrough part 2 guide covers the Pool Rooms in even more detail, including the exact locations of hidden doors and the safest routes through entity-dense areas. If you are playing on a device that struggles with performance, the supported devices guide has optimization recommendations that can help.
Advanced Strategies for Speedrunning and Optimization
Once you have beaten the game once, you will likely want to optimize your run. Speedrunning Unseen Liminality requires a different approach than casual play — you need to balance speed against the exploration threshold that the game requires. The current community record for a full run sits around 12 minutes, but that requires perfect route knowledge and precise entity avoidance.
The key optimization strategy is learning which points of interest count toward progression and which are optional. According to community testing, not all 17 areas of interest are required for the standard ending — you need roughly 12 to 14 of them, depending on which ones you find. This means you can skip the most dangerous areas if you know which ones are safe to ignore.
For speedrunning, the optimal route is a carefully calculated sequence that prioritizes the three core "liminal skips": the Vault Overlap in Chapter 2, the Staircase Desync in Chapter 4, and the Mirror-Gap cancel in the final chapter. Each skip shaves 45–90 seconds off the clock, but they demand frame-perfect inputs and a specific save-state setup. Crucially, the route intentionally bypasses the "Whisper Trigger" in the hotel lobby—a scripted event that, while required for the 100% ending, adds a 2-minute unskippable cutscene. For a pure "beat the game" run, sacrificing that trigger is the difference between a sub-25-minute finish and a 27+ minute one, making the route a calculated trade-off between completionism and raw speed.
-
The Lobby — Grab the two points of interest near spawn, exit immediately.
-
Hallways — Take the left path, check the three rooms with guaranteed spawns.
-
Pool Rooms — Follow the outer loop, hit the six points of interest on the perimeter.
-
The End — Trigger the ending as soon as the door opens.
The update log is essential reading for speedrunners because the Complete Overhaul changed several room layouts and entity spawn patterns. What worked in the previous version may no longer be optimal, and staying current with patch notes gives you a competitive edge.
Frequently Asked Questions
How long does it take to beat the game in Unseen Liminality?
A standard run takes 15 to 25 minutes for experienced players, while beginners should expect 40 minutes or more. Speedrunners have completed the game in around 12 minutes using optimized routes. The time varies significantly based on entity encounters and how quickly you find the required points of interest.
Do I need to find all 17 areas of interest to beat the game?
No, the standard ending only requires roughly 12 to 14 areas of interest, based on community testing. However, the secret ending and 100% completion require all 17. The game does not tell you which ones count, so exploring thoroughly is the safest approach.
Is there a final boss fight in Unseen Liminality?
No, the ending is triggered by interacting with a point of interest rather than defeating a boss. The final area, The End, has intense entity activity, but the ending itself is an environmental interaction. The secret ending has additional interaction requirements beyond the standard trigger.
Can I beat the game on a low-end device?
Yes, but you should adjust your graphics settings for better performance. The developers recommend max graphics, but lower settings still allow you to complete the game. The tradeoff is that visual cues for interactive objects become harder to spot, so you may miss points of interest.
What happens after I beat the game?
After the credits, you wake in The Lobby with progress saved. Hunt down leftover badges and hidden notes for 100%. No New Game Plus exists yet in this beta, but dev logs tease post-ending areas. Which ending are you chasing—standard or secret?