
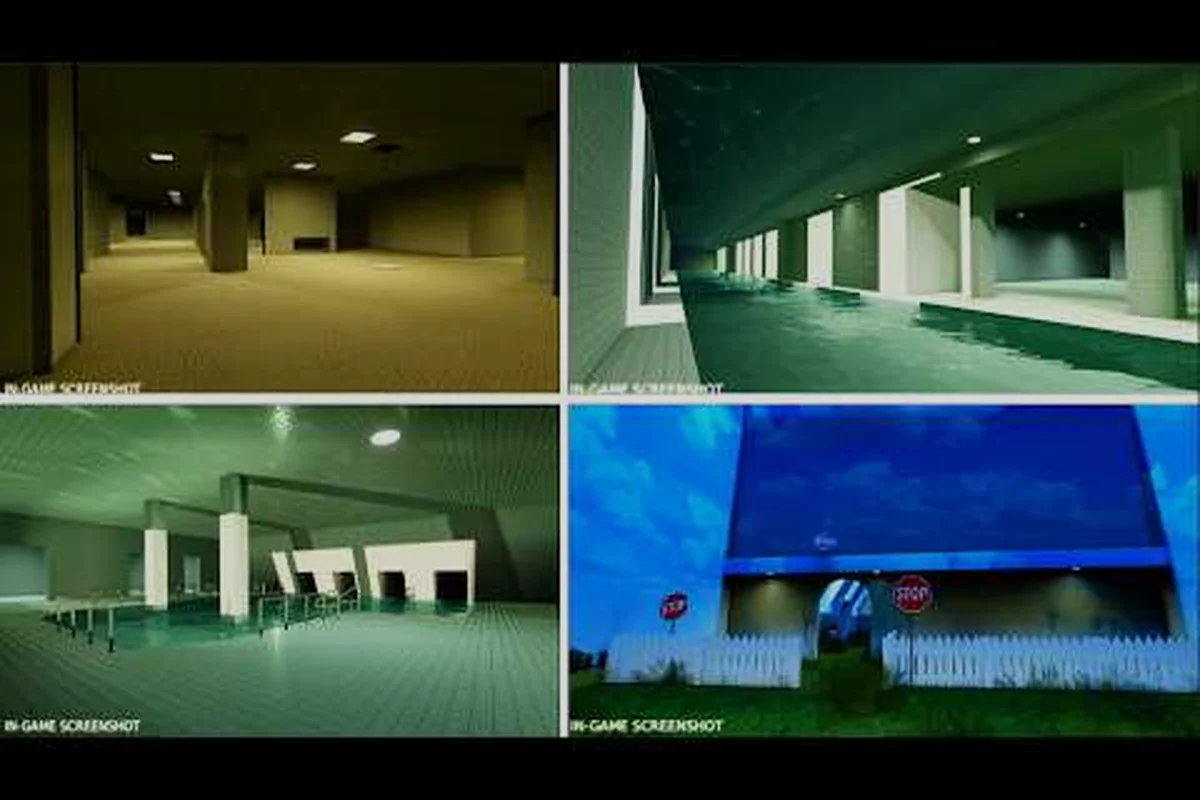
Unseen Liminality full gameplay takes you through a maze of yellow hallways, flickering lights, and constant dread, and knowing what lies ahead makes the difference between surviving and getting caught. This Roblox horror experience has grown into one of the most talked-about liminal space games in 2026, and players who understand the complete route from spawn to the final area consistently survive longer and unlock more content. Whether you are stepping into your first session or you have already died a dozen times, this breakdown covers every area, every major entity encounter, and what actually happens when you reach the end of the current build.
The game structures itself as a series of interconnected liminal spaces, each with its own layout, hazards, and secrets. Community walkthroughs, including the comprehensive Unseen Liminality Full Walkthrough by ItzVexo, confirm that the current beta contains five major playable areas with multiple points of interest scattered throughout. Understanding the unseen liminality full gameplay loop — explore, avoid entities, find the exit, repeat — is essential because each area introduces new mechanics that build on what you learned in the previous one. The first hour of gameplay typically involves learning the controls, memorizing the Lobby layout, and getting your first few entity encounters out of the way.
Unseen Liminality Gameplay Roblox: The Complete Area-by-Area Route
The unseen liminality gameplay roblox experience follows a linear progression through distinct zones, though each zone contains enough branching paths to keep exploration fresh. According to community testing and the complete overhaul gameplay video by Plus Roblox, the current build includes The Lobby, The Hallways, The Office, The Pool, and The Pool Rooms as the final accessible area. Each zone connects through specific doorways or transitions, and knowing these connection points prevents you from wandering in circles while entities patrol nearby.
| Area | Primary Hazard | Exit Condition | Notable Points of Interest |
|---|---|---|---|
| The Lobby | Minimal entity presence | Find the hallway door | Reception desk, vending machines, poster clues |
| The Hallways | The Looker patrols | Locate the office entrance | Hidden rooms, wall markings |
| The Office | Following Chair spawns | Reach the pool door | Computer stations, file cabinets |
| The Pool | SpongeBob Balloon Entity | Find the Pool Rooms entrance | Water reflections, echo effects |
| The Pool Rooms | Multiple entity types | Complete final objective | 17 areas of interest total |
The progression system rewards thorough exploration because several points of interest contain items or information that make later areas easier. Players who rush through the Lobby without checking the side rooms often miss the flashlight upgrade, which becomes nearly essential when you reach the darker sections of the Hallways. The complete area route follows a logical path, but deviating to search for secrets is almost always worth the extra risk.
The Lobby: Your Spawning Ground and First Test
The Lobby serves as the tutorial space, though it never explicitly tells you that. The layout features a central reception area surrounded by seating zones, vending machines, and a few side corridors that lead to storage rooms. Community reports indicate that entity spawns in the Lobby are rare during your first few visits, giving you room to learn the movement system and camera controls without constant pressure. The Lobby layout includes the main exit door that leads to the Hallways, but it remains locked until you interact with the reception desk computer.
The Hallways: Where the Game Gets Serious
Once you pass through the Lobby exit, the Hallways introduce the first real threat: The Looker. This entity patrols the long corridors with a distinctive visual pattern that makes it visible from a distance, but its movement speed catches many new players off guard. The Hallways also contain the first hidden rooms, which require you to notice subtle wall texture differences or follow audio cues. According to the full walkthrough video, the Hallways contain roughly five of the game's total points of interest, making this area a key hunting ground for completionists.
What Happens in the Unseen Liminality First Hour
The unseen liminality first hour typically follows a predictable pattern for most players, though individual experiences vary based on how thoroughly you explore and how quickly you encounter entities. Based on community data and multiple playthrough videos, the first hour breaks down into roughly three phases: orientation, first encounters, and route memorization.
| Time Segment | Typical Activities | Common Mistakes |
|---|---|---|
| 0-15 minutes | Learning controls, exploring the Lobby | Missing the flashlight, rushing the exit |
| 15-35 minutes | First Hallway exploration, first entity encounter | Sprinting too much, alerting The Looker |
| 35-60 minutes | Office exploration, understanding entity patterns | Ignoring audio cues, failing to crouch |
The first hour determines how smoothly the rest of your run goes because it establishes your familiarity with the game's core systems. Players who spend time learning the sprint and stamina mechanics in the Lobby before venturing into the Hallways report significantly fewer deaths in their first few sessions. The game's audio design plays a crucial role here — each entity has a distinct sound signature, and learning to identify these sounds by ear is one of the most valuable skills you can develop early.
Essential First-Hour Checklist
-
Learn the control scheme — sprint, crouch, and interact are your three most-used actions, and you should be able to execute them without looking at the keyboard
-
Find the flashlight upgrade — located in the Lobby's storage room, this item dramatically improves visibility in darker areas
-
Memorize the Lobby layout — knowing where the exit door is relative to your spawn point helps you orient yourself quickly
-
Practice crouch movement — several entities have reduced detection range when you crouch, making this essential for stealth approaches
-
Identify entity audio cues — each entity has a unique sound, and recognizing these sounds early gives you precious reaction time
Unseen Liminality What Happens at the End: Reaching the Pool Rooms
The question of unseen liminality what happens at the end has generated significant discussion in the community, especially since the complete overhaul update expanded the final area. The current build's ending takes place in the Pool Rooms, which serves as both the final playable area and the narrative conclusion for this update cycle. To reach the Pool Rooms, you must navigate through The Pool area and locate the specific doorway that triggers the transition.
The Pool Rooms ending sequence involves completing a final objective that requires you to interact with multiple points of interest in a specific order. Community testing suggests that the order matters, though the game provides subtle visual cues to guide you. Once you complete the objective, a short cutscene plays that reveals additional lore about the liminal space and hints at future content. According to player reports, the ending sequence takes roughly five to ten minutes to complete once you know what you are doing, but first-time players often spend significantly longer trying to figure out the correct interaction order.
The Final Objective Step-by-Step
-
Locate the three glowing tiles in the main Pool Rooms chamber — these are visible from the entrance and pulse with a faint blue light
-
Stand on each tile for three seconds — the tile will activate and remain lit, but stepping off early resets the progress
-
Check the wall markings after activating all three tiles — new symbols appear that indicate the next step
-
Follow the symbol sequence to the back corridor — the symbols correspond to doorways in the corridor
-
Enter the final doorway and interact with the terminal — this triggers the ending cutscene and completes the current content
Unseen Liminality Ending Explained: Lore and What Comes Next
The unseen liminality ending explained requires looking at both the immediate narrative payoff and the broader context of the game's ongoing development. The ending cutscene shows the player character standing in an empty version of the Lobby, but the lighting is different and the familiar vending machines are gone. A distorted voice speaks a short phrase that translates roughly to "you are still here," which community members interpret as a meta-commentary on the nature of liminal spaces and the game's loop structure.
The ending does not provide a traditional resolution — instead, it reinforces the game's core theme that the liminal space is inescapable. However, the cutscene does include a visual detail that has sparked significant speculation: a door appears in the background that does not exist in the normal Lobby layout. Many players believe this hints at future content, possibly a new area or an expansion of the existing map. The hidden hallway guide covers some of the secret areas that may connect to this hinted content.
What the Ending Means for Gameplay
| Interpretation | Community Consensus | Evidence |
|---|---|---|
| Loop continuation | The game intends for you to keep playing | The cutscene ends with the player back in the Lobby |
| Future content tease | The mysterious door hints at upcoming areas | The door does not exist in the normal Lobby |
| Narrative completion | The story arc for this update is finished | The cutscene provides closure for the current objective |
The ending's ambiguity is intentional, and the developer has not provided official clarification about the mysterious door. Community data suggests that the door may be a placeholder for an upcoming area, but as of August 2026, no official announcement has confirmed this. Players who want to explore every corner of the current build should check the complete walkthrough guide for additional details on secrets and collectibles.
Optimizing Routes for Full Gameplay Runs
Once you understand the basic route and the ending sequence, optimizing your unseen liminality full gameplay run becomes about efficiency and risk management. Speedrunners and experienced players have developed several strategies that reduce the time needed to reach the Pool Rooms while minimizing entity encounters. These strategies require practice, but they significantly improve your consistency across multiple runs.
The most important optimization involves understanding entity spawn patterns. While the game uses some randomization, certain entities have predictable patrol routes that you can learn and exploit. The Looker, for example, follows a fixed circuit through the Hallways, and timing your movement between its patrol points allows you to cross the area without ever being detected. Similarly, the Following Chair in the Office has a slower movement speed than the player, which means you can outpace it if you maintain a steady jog rather than sprinting.
| Optimization | Time Saved | Risk Level | Difficulty |
|---|---|---|---|
| Direct Lobby route | 2-3 minutes | Low | Easy |
| Hallway patrol timing | 3-5 minutes | Medium | Moderate |
| Office shortcut | 2-4 minutes | High | Advanced |
| Pool Rooms tile order | 1-2 minutes | Low | Easy |
Route Optimization Tips
-
Skip the Lobby side rooms if you already have the flashlight upgrade — the extra items are not worth the time investment on repeat runs
-
Wait for The Looker to pass before entering the Hallways from the Lobby — the entity's patrol circuit takes roughly 45 seconds to complete
-
Use the Office filing cabinets as cover when the Following Chair approaches — the entity cannot navigate around them efficiently
-
Memorize the Pool tile order from your first run — the sequence does not change between playthroughs, so you can complete the final objective without re-reading the wall markings
Frequently Asked Questions
How long does a full Unseen Liminality gameplay run take?
A complete run from spawn to the Pool Rooms ending typically takes 30 to 45 minutes for experienced players. First-time players usually need 60 to 90 minutes because they spend more time exploring, learning entity patterns, and figuring out the final objective. Speedrunners have completed runs in under 20 minutes using optimized routes.
What happens if you die during the ending sequence?
Dying during the final objective in the Pool Rooms drops you back at the Pool’s entrance, not the game’s start—so you skip the earlier areas. However, the three glowing tiles reset, forcing you to reactivate each before retrying the doorway. It’s a minor setback, not a full restart.
Can you continue playing after the ending?
Yes, the game returns you to the Lobby after the ending cutscene with all your progress intact. You can continue exploring, hunting for points of interest, and collecting badges. The mysterious door shown in the ending cutscene does not appear in the normal Lobby, so there is no post-ending area to access in the current build.
Is the ending different if you find all 17 areas of interest?
No, the ending cutscene is identical regardless of how many points of interest you discover. However, finding all areas of interest unlocks additional badges and cosmetic rewards that appear in your profile. The guide for the 2026 update provides a complete checklist for tracking your progress.
Does the game have multiple endings?
The current build has only one ending, triggered after finishing the Pool Rooms objective. No multiple endings are confirmed yet, though the cutscene’s mysterious door hints at future possibilities. Have you seen that final sequence, or are you still lost in the Hallways? Drop your run below.